How do you make a small fabric basket, tray tidy or bin for your reusable wipes?
Follow our DIY tutorial step by step!

Is your fleece, jacket or shirt worn or ruined?
Don't throw away any more old clothes - turn them into a fabric basket!
We all have clothing that we're about to throw away in our cupboards... But what if we were to give them a new lease of life?
Here we're going to share our tutorial, showing you how to transform your fleeces, jackets and shirts (made from a sufficiently sturdy fabric) into a practical basket or tray tidy,
ideal for storing your reusable make-up wipes, for example.
A quick and easy DIY tutorial!
Follow our DIY tutorial step by step!
· A worn fleece, shirt or jacket-type garment (a fabric that is sufficiently sturdy hold)
· A sewing machine and thread (or needle and thread if sewing by hand)
· Fabric scissors
· A ruler
· Paper and pencil
· A fabric pencil or chalk (or even a simple felt pen)
· Pins
Are you ready to give your clothes (or fabric scraps) a new lease of life?
Let's go!

Prepare a pattern for the size of the basket that you want to make. To do this, you need to know the desired final size (width, length and height).
NB: If you want a fold-over cuff at the top, add the size of the cuff to your final height.
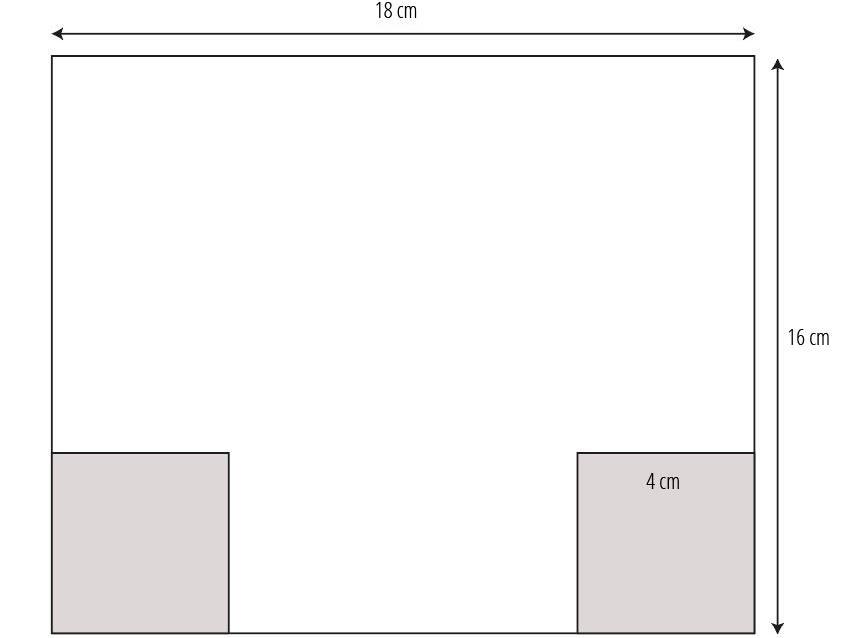
Draw a rectangle:
Width = Length + Width + 2 cm (for seam allowance)
Height = Height + Height of fold-over cuff + (Width /2) + 2 cm (for seam allowance)
Draw two squares at the bottom of this rectangle:
Size of squares = Width / 2
Don't fancy working it out? Here are examples of three different sizes:
Basket W8xL8xH8, with 2 cm fold-over cuff: rectangle measuring 18 x 16 cm, and 4 cm squares.
Basket W10xL10xH10 with 3 cm fold-over cuff: rectangle measuring 22 x 20 cm, and 5 cm squares.
Basket W12xL12XH12, with 3 cm fold-over cuff: rectangle measuring 26 x 23 cm, and 6 cm squares.
If you want to recycle a garment: If you want to retrieve as much fabric as possible so you can lay it out completely flat, cut open the side, sleeves and shoulder seams.
Otherwise, just lay your fabric flat.
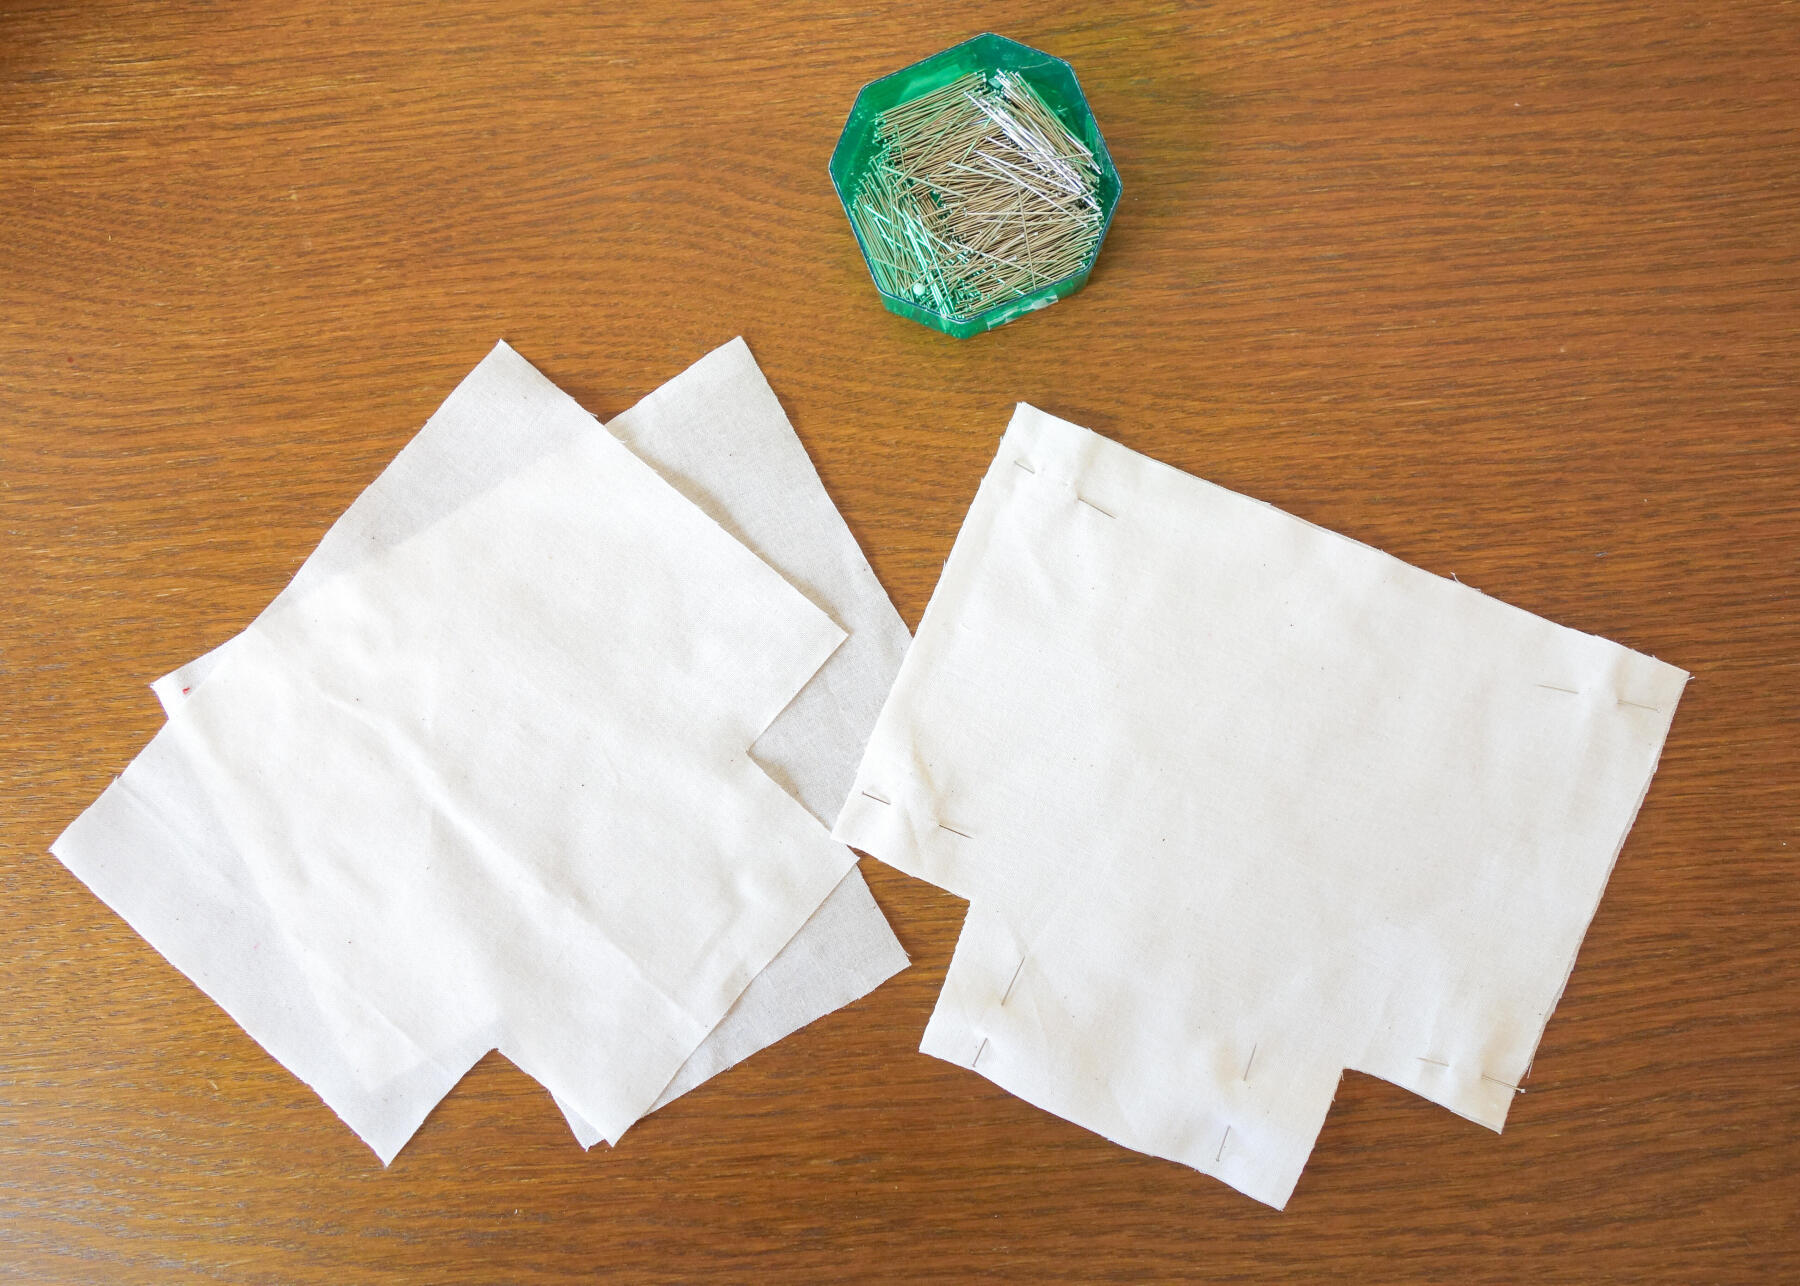
Pin your pattern and cut out 4 times.
If you're using 2 different fabrics, cut out two pieces from each fabric. This will give you a reversible basket which is quite cute.

Place 2 layers of identical fabric against each other, right side facing. And pin together.
Then sew 1 cm in from the edge on all 3 sides (side and bottom seams). Remember to use a backstitch to secure your work at the beginning and end of every seam.

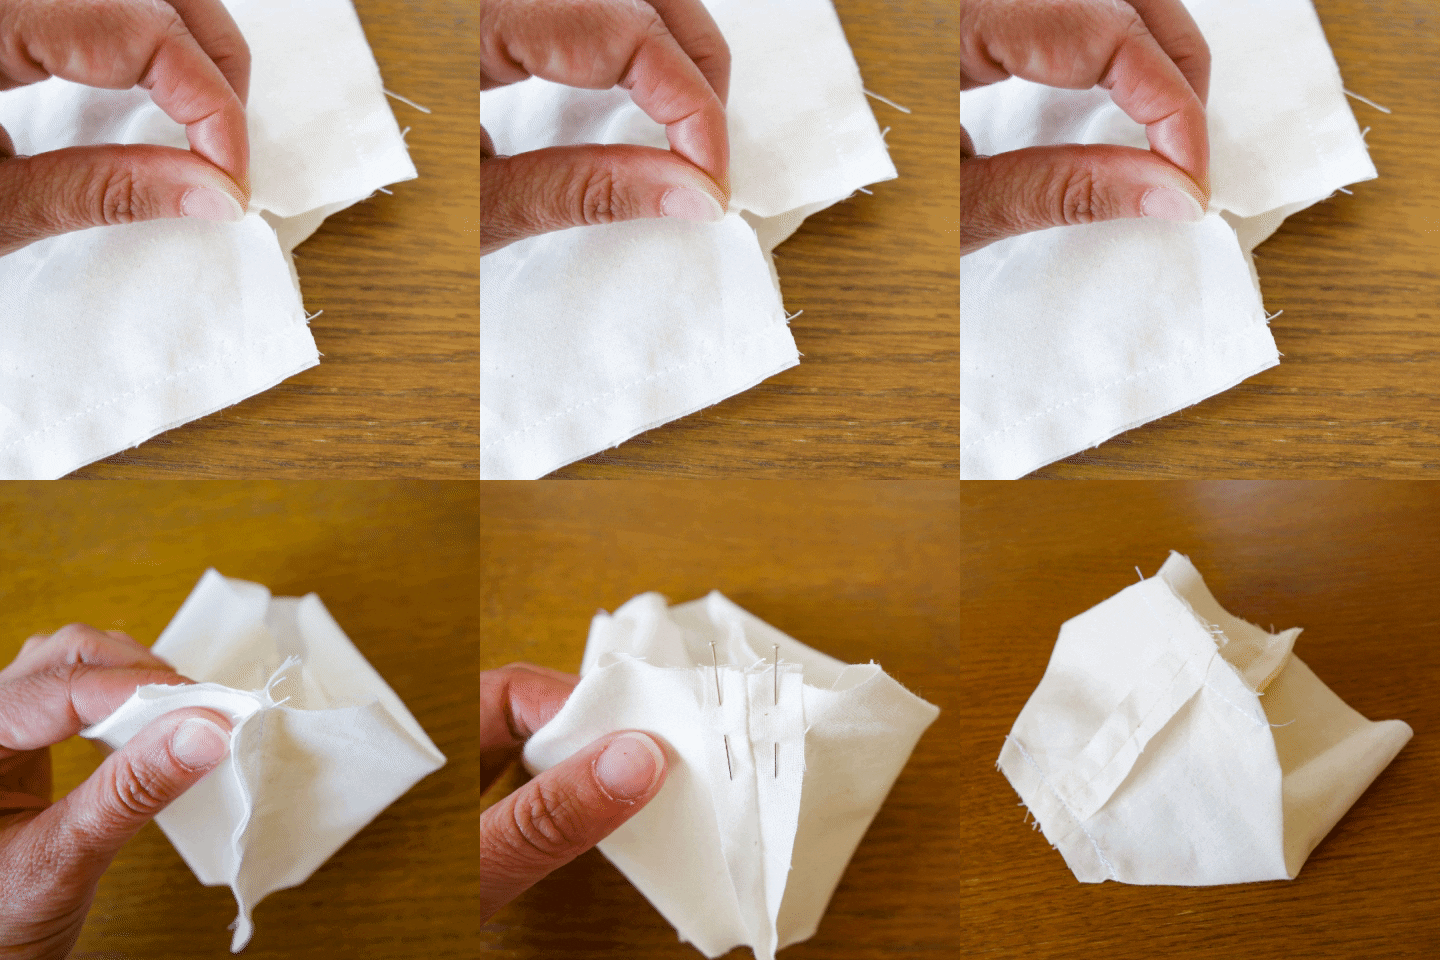
Then, make the corner of the base. You just need to open the "squares" by aligning the side seam and base seam.
Ideally, open the seam allowances, on either side of the seam, to reduce bulk.
Stitch 1 cm in from the line formed.
Now you have your first basket. Just repeat the same steps to make your second basket which will form the base (reversible).

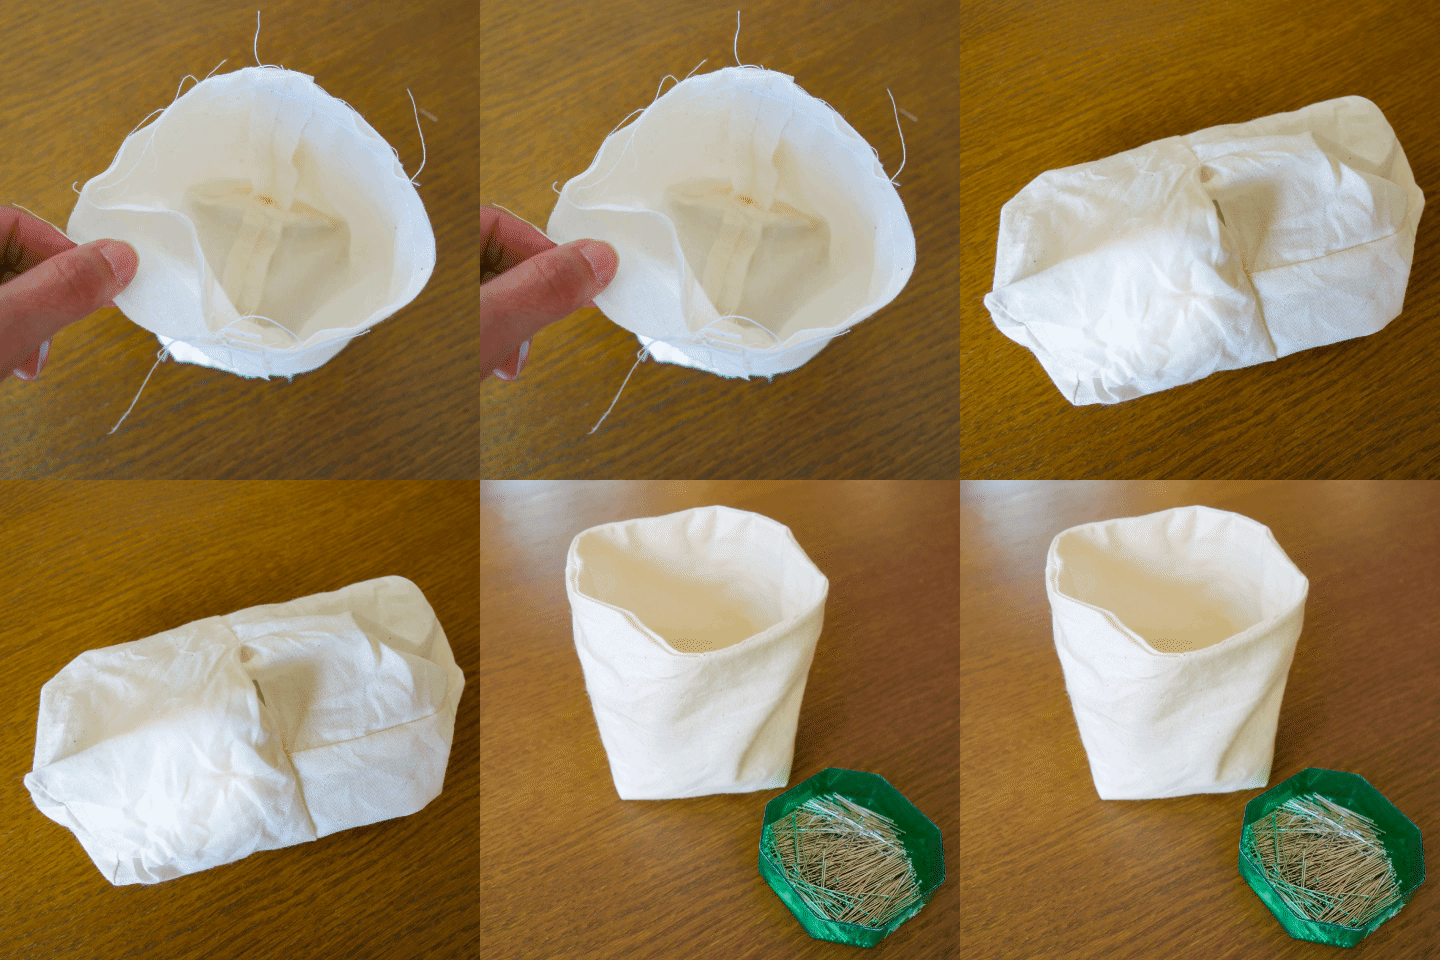
Now turn one of the baskets right side out and place it inside the other basket, making sure the upper edges are aligned. The two fabrics should be right sides facing.
Pin the upper edges together and stitch a 1 cm seam around most of the top edge.
Leave a small opening in the stitching for turning your basket inside out.
Turn your handiwork inside out through the opening you left earlier and insert one basket inside the other, then stitch around the top, 2mm from the edge (you can iron the edge before stitching so it's easier to manipulate and looks neater).

Please share your most beautiful DIY creations with us on social media, using #quechua
At Quechua, we use a variety of cleaner processes and technologies to design our products and minimize the environmental impact of our equipment.
